Turning Trash Into Art
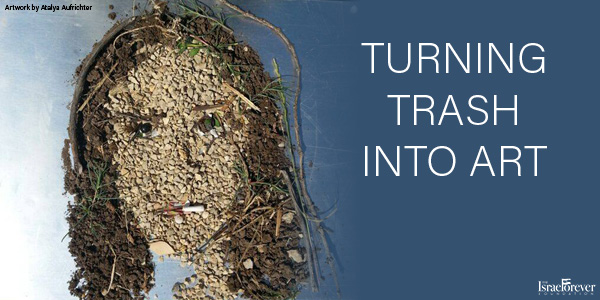
This activity is inspired by the work Israeli artist Atalya Aufrichter who creates amazing art pieces with recyclables in an effort to offer a beautiful solution to the issue of too much non-biodegradable trash - namely, plastic bottles and highlight the issues of sustainability and environmentalism
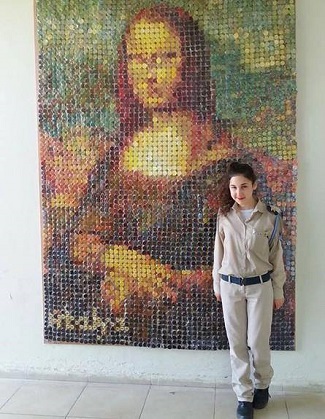
During her enlistment in the Israeli Air Force, she and her coworkers would recycle plastic bottles and use the bottle caps to create a mosaic on a canvas. The bottle caps were then painted to create detailed images. Using thousands of bottle caps helped Atalya demonstrate the scale of how much plastic people go through. Each mosaic is a recreation of a famous painting, such as the Mona Lisa. Up close, one can see the bottle caps are painted with various shades and colors that look unique, but from afar, the caps act like puzzle pieces that complete the creation in a unifying fashion.
You too can bring these ideas to your home and/or your community with creative bottle cap art!
This activity is suitable for children of all ages and can be done as an individual or community project.
SUPPLIES NEEDED
- Bottle caps and lids of all shapes and sizes
- Wood board to attach your bottle caps to; sanded if necessary
- Glue or adhesive suitable for attaching plastic to wood
- Spray paint, acrylic paint and appropriate painting supplies if you would like to paint the caps another color.
- Pencil for sketching your design onto the wood panel
- Bins for sorting bottle caps during the collection period
- Hanging kit to hang the final artwork
STEPS TO TURN YOUR TRASH INTO ART
We suggest this activity as a community activity to enhance unity and cooperation while highlighting important values such as personal responsibility for each other, our environment and empowering participants to creatively transform negatives (trash) into something positive (art).
- The first thing to do is to present your idea to your school administration. Once you get approval to run this project, write an announcement to your community ie: school, synagogue, youth group, etc, announcing that you are initiating a community-wide project that will continue throughout the school year and will culminate with an amazing and unique piece of art that will be displayed somewhere on the premises (be sure to arrange with the proper individuals first).
- Designate a Bottle Cap Donation Drop off area. A bookshelf lines with shoebox-sized clear plastic bins work great! We sorted ours by color so people could easily drop their donation off. As the bins filled up, we moved them to larger color coordinated bins that were kept in a storage room.
- Collect your bottle caps of all colors, shapes & sizes
- Arrange your plastic bins or shoe boxes to sort the caps by color as you collect them. This makes it easier as time goes on & eliminates the need to sort tons of bottle caps at one time. If collecting the bottle caps at a school or synagogue, we recommend placing the shoebox-sized bins onto the bookshelf and color coding them accordingly so people can drop them off and sort them as time goes on.
- Develop the image you want to depict in your final art creation or find the picture you want to replicate in bottle caps. Peruse our site to find Jewish or Israel inspired imagery you can use for your design: Jewish symbols, Hebrew words or Israeli landscapes are just a few ideas...
- Measure the space you want to hang your final artwork
- Purchase flat smooth wood board to use as your backing for your creation.
- Sketch your design onto the wooden base. Some artists like to label the color that goes into each section.
- Begin attaching the bottle caps to the wood. Let sit undisturbed until the glue has dried completely. Some artists like to lay out their bottle caps in place prior to securing with the glue.
- Continue working on your creation until you determine it is complete.
- Install the hanging kit on the backside of your creation.
- Hang proudly for all to enjoy your one of a kind creation!
- Draft a placard with the title of your project, a short description of the artwork and
- Kindly email photos of your unique creations to Stefie@IsraelForever.org for us to post on our website!
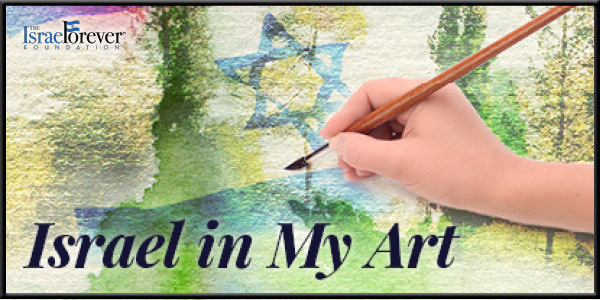
Have your artwork featured in our online Israel in My Art gallery! Sign your artwork with your first name and last initial and email it to Stefie@IsraelForever.org
Painting as a part of a class or art group? Send us your selfies and group pics for a shoutout throughout our global Jewish community who loves sharing the Israel connection with their fellow Virtual Citizens of Israel around the world. Follow us social media and you can either post your pic online and tag us in your post or email it directly to Stefie@IsraelForever.org.
Help your students find unique ways you to incorporate the Israeli flag and the flag of the country in which you reside into your drawings as well, so that the world can see the vast number of nationalities of our IFF artists!
Recommended for you:
FEEL ISRAEL, THROUGH ART.
Get inspired and create your own art today!
About the Author